Creating Widgets in WordPress: A Guide to Adding Functionality and Customization to Your Blog
The Benefits of Using Widgets in WordPress for a More Engaging and User-Friendly Blog
Widgets are an important feature of WordPress that allows you to easily add functionality and content to your website. In this response, we'll discuss how to create a widget, the use of widgets, the implementation of widgets, and where to use widgets in WordPress. We'll also look at the benefits of widgets in WordPress.
Creating a Widget in WordPress
Creating a widget in WordPress is a fairly simple process. You can create a widget by defining a class that extends the WP_Widget class. Within that class, you will define functions for the widget output, widget settings, and widget form fields. Once you have defined your widget class, you will need to register it with WordPress using the register_widget() function.
Here is an example of how to create a widget in WordPress that allows users to add the shortcode of Contact Form 7 and display it on the front-end part.
<?php
// Register the widget
function wpb_load_widget() {
    register_widget( 'Contact_Form_Widget' );
}
add_action( 'widgets_init', 'wpb_load_widget' );

// Widget class
class Contact_Form_Widget extends WP_Widget {

    function __construct() {
        parent::__construct(
            'contact_form_widget',
            __('Contact Form Widget', 'wpb_widget_domain'),
            array( 'description' => __( 'A widget that displays a Contact Form 7 form', 'wpb_widget_domain' ), )
        );
    }

    // Widget output -> For Front-end part.
    // You can add your custom code for front end part for design and enhancement for the same.
    public function widget( $args, $instance ) {
        echo $args['before_widget'];

        // Widget Title
        if ( ! empty( $instance['title'] ) ) {
            echo $args['before_title'] . apply_filters( 'widget_title', $instance['title'] ) . $args['after_title'];
        }

        // Contact Form 7 shortcode
        $shortcode = ! empty( $instance['shortcode'] ) ? $instance['shortcode'] : '';

        echo do_shortcode( $shortcode );

        echo $args['after_widget'];
    }

    // Widget form fields
    public function form( $instance ) {
        $title = ! empty( $instance['title'] ) ? $instance['title'] : '';
        $shortcode = ! empty( $instance['shortcode'] ) ? $instance['shortcode'] : '';
        ?>
        <p>
        <label for="<?php echo $this->get_field_id( 'title' ); ?>"><?php _e( 'Title:' ); ?></label>
        <input class="widefat" id="<?php echo $this->get_field_id( 'title' ); ?>" name="<?php echo $this->get_field_name( 'title' ); ?>" type="text" value="<?php echo esc_attr( $title ); ?>" />
        </p>
        <p>
        <label for="<?php echo $this->get_field_id( 'shortcode' ); ?>"><?php _e( 'Contact Form 7 Shortcode:' ); ?></label>
        <input class="widefat" id="<?php echo $this->get_field_id( 'shortcode' ); ?>" name="<?php echo $this->get_field_name( 'shortcode' ); ?>" type="text" value="<?php echo esc_attr( $shortcode ); ?>" />
        </p>
        <?php
    }

    // Save widget form data
    public function update( $new_instance, $old_instance ) {
        $instance = array();
        $instance['title'] = ( ! empty( $new_instance['title'] ) ) ? strip_tags( $new_instance['title'] ) : '';
        $instance['shortcode'] = ( ! empty( $new_instance['shortcode'] ) ) ? strip_tags( $new_instance['shortcode'] ) : '';
        return $instance;
    }
}

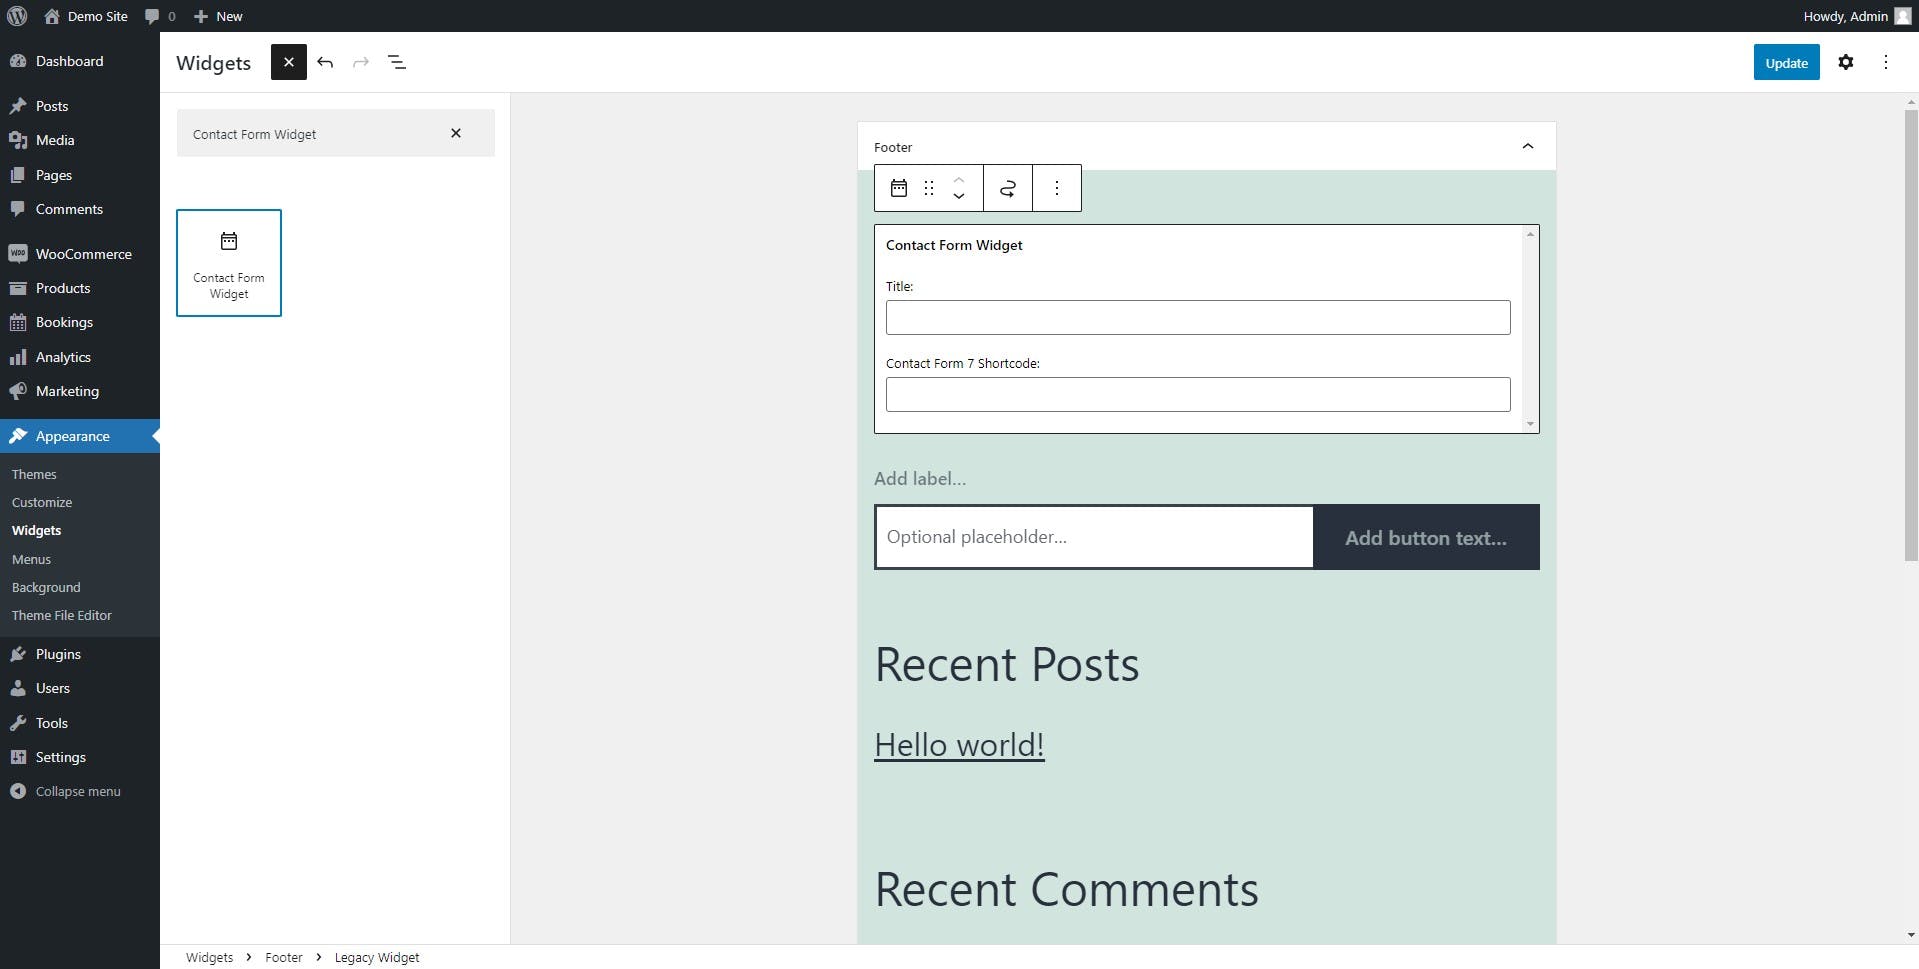
In the above code, we have created a widget called "Contact Form Widget". It has two fields, one for the widget title and the other for the Contact Form 7 shortcode. The shortcode is rendered on the front-end part using the do_shortcode() function.
To use this widget, add the above code to a file in your WordPress theme directory (e.g. functions.php). Then, go to your WordPress Dashboard and navigate to Appearance > Widgets. You will see the "Contact Form Widget" listed there. Simply drag it to your desired widget area, fill in the required fields, and click the "Save" button. The Contact Form 7 form will be displayed
Use of Widgets in WordPress
Widgets are used to add content to your website's sidebar, footer, or other widgetized areas. These areas are defined by your WordPress theme, and are usually labeled as "widget areas" or "sidebars". You can add widgets to these areas by going to Appearance > Widgets in your WordPress Dashboard, and dragging and dropping widgets from the list on the left into the widget areas on the right.
Widgets can be used to display a wide range of content, including recent posts, categories, archives, tags, calendars, search forms, custom menus, text, images, and more. WordPress comes with several built-in widgets, but you can also create your custom widgets using the process described above.
Implementation of Widgets in WordPress
To implement a widget in WordPress, you will need to follow a few basic steps:
Create the widget class: Define a class that extends the
WP_Widgetclass and defines the widget output, settings, and form fields.Register the widget: Register the widget with WordPress using the
register_widget()function.Add the widget to a widget area: Go to Appearance > Widgets in your WordPress Dashboard, and drag the widget into the desired widget area.
Configure the widget: Fill in any necessary fields in the widget settings form to configure the widget.
Where to Use Widgets in WordPress
Widgets can be used in a variety of places in WordPress, but they are most commonly used in the following areas:
Sidebar: The sidebar is the most common place to use widgets. Most WordPress themes have one or more widget areas in the sidebar.
Footer: Some WordPress themes have widget areas in the footer, which can be used to display information such as a copyright notice, social media links, or other content.
Homepage: Some WordPress themes allow you to use widgets on the homepage, which can be used to create custom layouts and add content to the homepage.
Benefits of Widgets in WordPress
Widgets offer many benefits in WordPress:
Ease of use: Widgets are easy to use and can be added to your website without any coding knowledge.
Flexibility: Widgets can be used to display a wide range of content, and can be customized to fit the needs of your website.
Customizability: Custom widgets can be created to display unique content that is specific to your website.
Reusability: Widgets can be reused across multiple pages or posts, making it easy to add consistent content to your website.
In conclusion, widgets are a powerful feature in WordPress that allows you to easily add content and functionality to your website. They are easy to use, flexible, customizable, and can be reused across multiple pages or posts. By learning how to create and use widgets, you can take full advantage of the benefits that WordPress has to offer.

